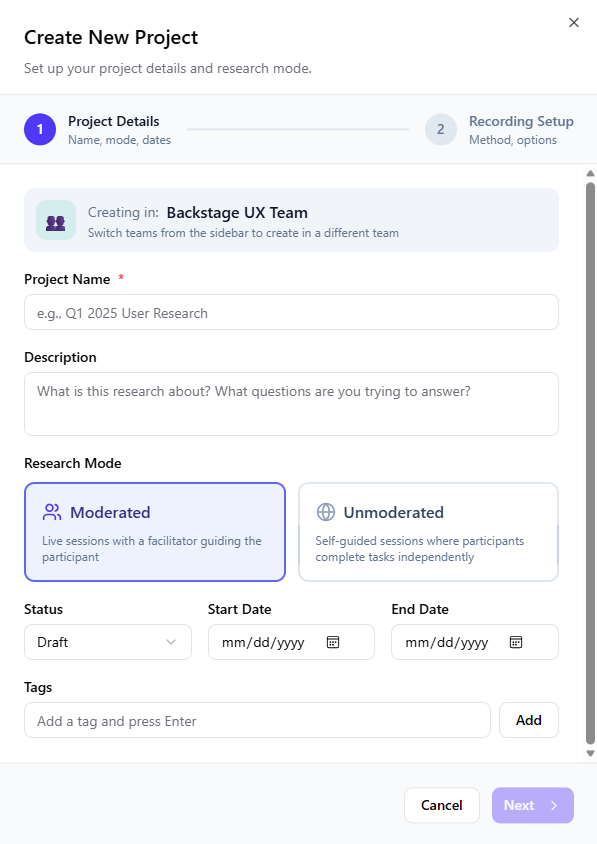
Creating a New Project
A project is a container for a research study. It holds your participants, tasks, sessions, and synthesis work.
Projects move through a lifecycle: Draft → Active → Completed → Archived
-
From the Dashboard, click New Project.
-
Enter the Project Name and Description.
-
Select the Research Mode:
-
Moderated: Live sessions with a facilitator guiding the participant. You can use an external meeting app (Zoom, Teams, Meet) for recording or enable browser-based recording. This mode is ideal when you need to probe deeper into participant behavior, ask follow-up questions, and gather rich qualitative feedback.
-
Unmoderated: Self-guided sessions where participants complete tasks independently. By default, the unmoderated mode uses browser-based recording to capture screen, audio, and interaction data automatically. This mode is ideal for larger sample sizes, geographic distribution, and when participants prefer flexibility in scheduling.
-
-
Select the Status.
- Draft: Initial setup and configuration
- Active: Currently conducting research
- Completed: Research phase finished, synthesis in progress
- Archived: Study closed, available for reference
-
Enter the Start Date and End Date (optional but recommended for timeline tracking).
-
Add tags for organization (e.g., "Q1-2025", "Mobile", "Checkout Flow").
tipTags help you track and view NPS and SUS trends (Trend Analysis) for all participants in the team's Active and Completed projects.
-
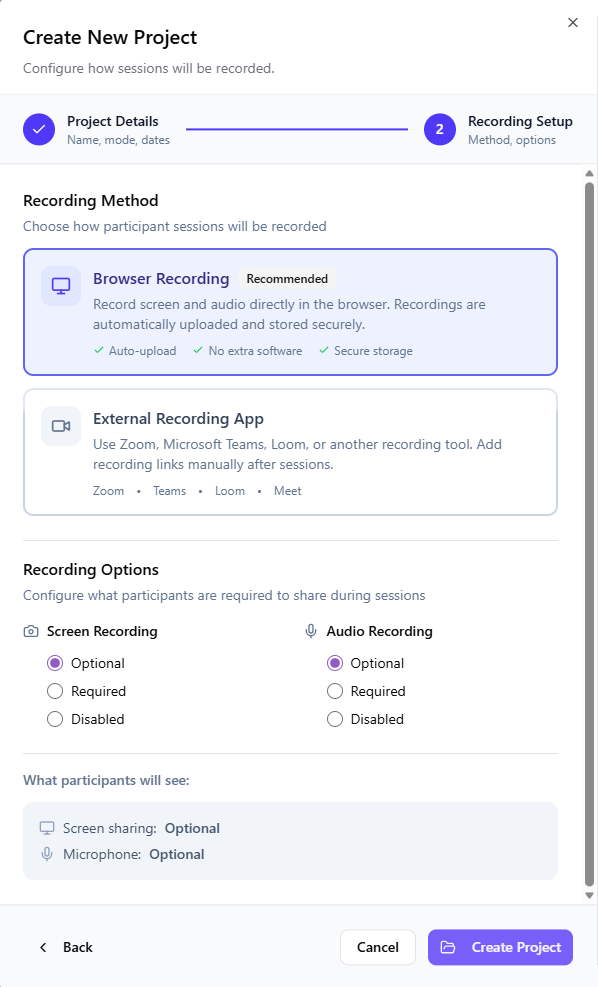
Click Next. Then select the Recording Method, which determines how participant sessions will be recorded.
-
Configure what participants are required to share during sessions.
-
Click Create Project.